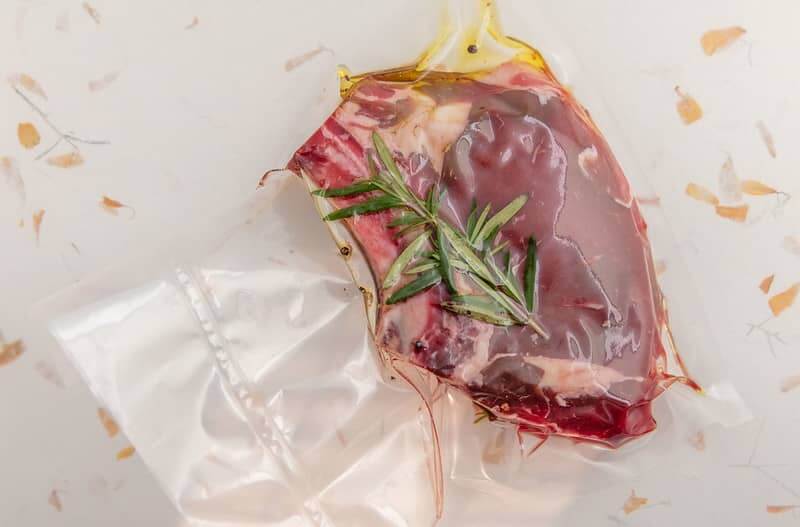
Making a big impression during your next dinner party may require some new equipment in the kitchen. Anyone can learn to use the cutting-edge technique known as sous vide to create amazing meat dishes at home. Here’s how to break into sous vide with easy and reliable beef short ribs.
Introduction to Sous Vide Cooking
The term “sous vide” literally translates to “under a vacuum” in French. That’s a reference to the fact that the food you’re cooking is sealed in a vacuum package before being submerged in water. The water is held at a temperature far lower than your usual cooking temperatures. In fact, you usually use a temperature very close to the desired finished temperature in the food. This ensures that the short ribs in this case would become perfectly cooked without the risk of overcooking.
Sous vide is different from other traditional cooking methods because it simply takes more time. For bone-in meat like beef short ribs, you may have the water bath going for 48 or even 72 hours before your meal is ready to eat. When it comes to slow and low cooking, sous vide is the ultimate technique. It creates a concentrated flavor and ultra-tender texture that no other type of cooking can produce.
What are Beef Short Ribs?
Short ribs are bone-in pieces of beef cut from the chuck or plate section near the ribs of the cow. The meat is trimmed so the very ends of the ribs are still attached to the chunks of meat. They’re very meaty and easy to cook because of their small size. They respond well to the sous vide cooking method because the low and slow application of heat won’t leave them completely falling apart. There’s a good proportion of fat and connective tissues in the meat, both of which melt and add flavor and texture to the meat over the extended cooking time.
Benefits of Cooking Short Ribs Sous Vide
Beef short ribs are a little on the tough side if they’re baked in the oven or tossed on a grill. However, they have great flavor when cooked in a way that tenderizes them. Sous vide breaks down the tougher parts of the tissue and leaves it almost as soft as foie gras once the extended cooking period is done. You can practically eat them with a spoon. It’s also a largely hands-off cooking method that only requires occasional checking to ensure the temperature remains steady in the water bath.
Preparation of Short Ribs for Sous Vide
Most short ribs will work well for this method, but you want a meaty set of ribs with a decent amount of bone attached and not too much fat. You may want to trim the outside of each rib piece to reduce the fat attached. Too much fat left on could interfere with the cooking process by making it hard to keep the vacuum package pressurized over the cooking period. You don’t necessarily need to marinate the meat because any seasonings you add will penetrate the meat during the pressurized cooking process. Before cooking, bring the short ribs to room temperature and sprinkle them with a light coating of flaky Kosher salt. This draws some of the moisture out and prepares the meat to better absorb the other seasonings you add to the surface.
Sous Vide Cooking Process
The entire sous vide cooking process goes a little differently than your usual grilling or frying experience. You start with a vacuum packing machine and end with a dish that’s perfectly cooked without much intervention on your part. Searing the short ribs before you package them is the best way to add flavor without affecting the texture of the finished dish. These other tips will ensure your sous vide results are safe to eat.
Optimal Temperatures and Times for Cooking Short Ribs
The cooking temperature and time largely depend on the finished texture you desire. For a braised texture that’s so tender it falls off the bone, use a water bath temperature of 165 degrees F and cook for 12 hours. For a less well-done finish that is still tender and juicy with a pink color, aim for 145 degrees F and a 24-hour cook. If you want the extra tender texture of a long 48-hour cook, use a 131-degree F temperature setting.
Best Home Sous Vide Equipment
You need a sous vide cooker and a cooking vessel for this method. The cooker is a water heating device that circulates the water so it remains at the right temperature throughout the vessel. Most people use plastic food storage containers or metal cooking pots as their submersion vessels. Aside from that, you just need a quality digital thermometer. Investing in a thermometer with a temperature alarm and temperature tracking is highly recommended so you can be sure your food stays within the safe temperature range.
Water Bath Setup and Safety Tips
Set up your sous vide cooker in a cooking vessel that can handle the hot water. Always keep the water above 130 degrees F and ensure that it’s always circulating evenly. If the vacuum package becomes compromised, discard the meat and start over. Without correct pressure inside the package, the heat can’t penetrate the meat fully and may not cook it properly.
Monitoring the Cooking Process
Check the sous vide water bath hourly when you’re awake, including with a monitoring app or camera if possible. Try to tackle this process on a weekend when you’re around rather than during the work week. A tracking digital thermometer gives you peace of mind during the overnight period when you can’t check the temperatures yourself.
Tips and Tricks for the Best Sous Vide Short Ribs
Play around with the time and temperature combinations you try, always staying above 130 degrees F and over 12 hours. You may discover that you personally prefer a texture that comes from a very specific temperature and time setting. Try various sauces like red wine reductions and au jus to complement the naturally rich flavor of this dish.
Troubleshooting Common Sous Vide Issues
Make sure your vacuum-sealed package floats in the center of the water vessel and doesn’t block water flow. You may need a larger vessel and a bigger sous vide cooker if your usual setup can’t handle the size. Top the water up two to three times a day so evaporation doesn’t become a problem. Adding a lot of water at once drops or raises the temperature and makes it hard to maintain an even cooking environment. You can put clean ping pong balls or practice golf balls on the surface of the water to slow evaporation as well. Make sure the package is always under the surface of the water as well. Try a stainless steel weight, a cooking rack, or sous vide clips to anchor the package. If you’re cooking multiple packages of short ribs at once, use a stainless steel rack to hold them apart for even cooking.
Sous Vide Short Ribs Recipe
- 3 lbs of beef short ribs
- 2 tablespoons of canola or avocado oil
- ½ teaspoon of salt
- ½ teaspoon of black pepper
- 1 tablespoon of butter
- 1 clove of garlic, sliced
- 1 bay leaf
- 2 sprigs of fresh thyme or rosemary, or 1 of each
1. Heat a cast iron pan on the stove while the immersion bath is heating. Add the oil to the pan and sear the beef short ribs on all sides until they’re evenly browned.
2. Open a vacuum sealing package. Let the ribs cool a little, then place them in the package along with the butter, salt and pepper, garlic, and herbs. Vacuum seal the package.
3. Place the package in the immersion bath once you’ve verified it has come to temperature. Cook at 145 degrees F for 24 hours, or use the temperature and time combinations recommended above.
4. Once the cooking time has elapsed, place the package in ice water to cool it rapidly. If you are going to immediately eat the short ribs, this step is unnecessary. If you will not eat the meat within the next 2 hours, chill the package before storing it to prevent any food safety issues.
Sous Vide Short Ribs – Nutritional Facts
Per Serving (based on 6 servings, based on a 2,000-calorie daily diet)
| Nutrient | Amount (% Daily Value (DV)) |
|---|---|
| Calories | 520 (26%) |
| Total Fat | 40g (51%) |
| Saturated Fat | 17g (85%) |
| Trans Fat | 2g |
| Cholesterol | 125mg (42%) |
| Sodium | 280mg (12%) |
| Total Carbohydrate | 0g (0%) |
| Dietary Fiber | 0g (0%) |
| Total Sugars | 0g |
| Added Sugars | 0g (0%) |
| Protein | 36g (72%) |
| Vitamin D | 0.2mcg (1%) |
| Calcium | 24mg (2%) |
| Iron | 3.8mg (21%) |
| Potassium | 580mg (12%) |
Conclusion
Sous vide short ribs will wow your dinner guests and please any meat-loving palate. Make the most of this affordable cut of well-marbled beef with this unique immersion cooking method.

Sous Vide Short Ribs
Ingredients
- 3 lbs beef short ribs
- 2 tbsp canola or avocado oil
- 1/2 tsp salt
- 1/2 tsp black pepper
- 1 tbsp butter
- 1 clove garlic, sliced
- 1 bay leaf
- 2 sprigs fresh thyme or rosemary, or 1 of each
Instructions
- Heat a cast iron pan on the stove while the immersion bath is heating. Add the oil to the pan and sear the beef short ribs on all sides until they’re evenly browned.
- Open a vacuum sealing package. Let the ribs cool a little, then place them in the package along with the butter, salt and pepper, garlic, and herbs. Vacuum seal the package.
- Place the package in the immersion bath once you’ve verified it has come to temperature. Cook at 145 degrees F for 24 hours, or use the temperature and time combinations recommended above.
- Once the cooking time has elapsed, place the package in ice water to cool it rapidly. If you are going to immediately eat the short ribs, this step is unnecessary. If you will not eat the meat within the next 2 hours, chill the package before storing it to prevent any food safety issues.

