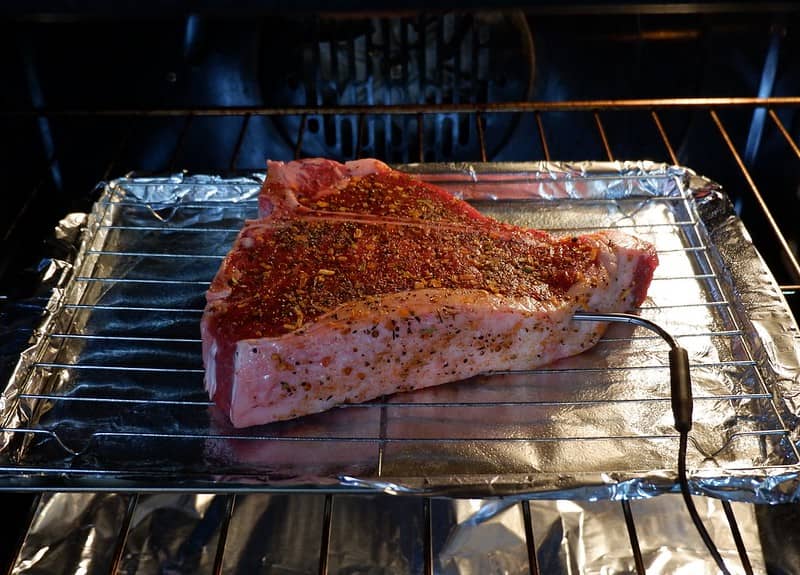
If you have any experience with handling meat and cooking steaks in particular, you’ve likely learned the traditional way to sear. Searing meat simply means cooking the surface at a high temperature so it browns and forms a crust that traps moisture inside while increasing overall flavor. One of the more traditional ways to cook a steak is to sear it in a cast iron pan for a few minutes, then finish cooking it on the grill or in the oven. This is specifically known as sear roasting. For an even more tender and flavorful result, consider the reverse sear process instead.
What Is Reverse Searing?
With the traditional method of searing, you’ll handle creating the brown crust on the outside of a steak before it’s cooked with another method. When you choose to reverse the searing process, you sear at the end. This is a relatively new way of cooking steaks that can offer a number of benefits. Most importantly, it makes the entire process easier when cooking steaks indoors and without the benefit of a patio and a full-sized grill. While you can certainly reverse sear after cooking a steak on the grill, it’s even better when paired with a slow cook in the oven to start it off.
Why It Works
There is a much longer history of traditional searing for steak than reverse searing. However, this relatively new method works better than the old-fashioned one in many ways.
More Even Cooking
When searing the steak first, the browned crust around the steak continues to cook in the grill or oven. This means that there’s inevitably a small amount of overdone meat between the center and surface of the steak. Depending on how you sear and how long you still need to cook a thick cut, you could end up with highly uneven results. Searing at the end allows the majority of the steak to reach the desired level of doneness before the surface is browned, resulting in the least amount of overcooked meat possible. You’ll find the rosy red color of a medium-rare steak extends almost all the way to the surface with this method.
Better Browning
Since the steak is nearly done by the time it goes in the pan for searing, it’s drier and firmer on the surface than a raw piece of meat. This means it browns more evenly and more thoroughly without a lot of exposure to heat. You’ll see that traditional searing methods call for dry brining or dabbing the steak with paper towels to dry the surface before browning. By letting the oven or grill do that work, you’ll get better browning with a reverse sear.
More Tender Meat
By starting with a slow cooking method, you’ll let enzymes spread throughout the meat that helps soften the tissue. Fat also spreads slowly and evenly, resulting in a tender texture and an almost buttery flavor. This benefit alone makes it worth trying a reverse sear to see how you like it.
More Flexibility
Many home cooks can’t use their propane or charcoal grill year-round. By using your kitchen oven and a cast iron pan on the stovetop, you’ll enjoy flavorful and perfectly seared steak in every season. Yet reverse searing also works well on steaks cooked on the grill as long as you can provide a low and slow cook for the first stage.
Tips and Tricks For The Best Reverse Sear Steak
You only need a few tips and tricks to put the reverse sear method to work in your kitchen.
Cook the steak on low heat to make it more tender
Whatever method you choose for the first half of the process, make sure the temperature is low. It’s best to keep the oven or grill below 250 degrees F when possible. Some people cook steaks at temperatures as low as 175 degrees to ensure they don’t toughen in the process.
Use a smooth, medium-weight cast iron pan
Medium-weight cast iron will heat up quicker than a very thick pan, but it won’t hold heat so long that it risks burning the steak. Make sure the surface is smooth and properly seasoned before searing.
Finish with butter
You’ll need a neutral-flavored high-heat oil for searing the steak. But for flavor, many steak experts recommend adding a tablespoon or two of salted butter at the end of the searing time. This elevates the flavor further, especially on a lean cut like the Filet Mignon.
Disadvantages of Reverse-Searing Steak
One of the only downsides to this method is the need for tongs to transfer the hot steak from the grill or oven pan to the stovetop. You’ll also need a cast iron pan, but this is true if you want to follow the traditional sear method as well.
How Long To Reverse Sear Steak: Time Chart
No matter the thickness, you’ll want to only sear the steak for about 45 seconds to 1 minute on each side. This means you’ll need the steak to reach nearly the temperature desired for doneness, but about 10 degrees below. Aiming for just under the desired temperature ensures that searing won’t bring it up too high and overcook your steak.
Reverse Seared Steak Recipe
Ingredients
- 1 thick-cut steak, at least 1.5 to 2 inches thick for best results
- ¼ to ½ teaspoon of salt, depending on the steak size
- Cracked black pepper to taste
- 2 tablespoons of a high-heat oil with a neutral taste, such as sunflower or avocado oil
- 2 tablespoons of salted butter (optional)
Instructions
1. Preheat your oven to 250 degrees F or prepare your grill and let it settle at around that temperature. Cook the steak until it reaches a temperature 10 degrees below the desired level of doneness, checking often with a meat thermometer.
2. Move the steak to a plate and heat the cast iron pan on a stovetop. Add the neutral oil. When a drop of water shimmers on the oil, add the steak. Flip it so all of the sides are seared for about 45 seconds to 1 minute each. Add the butter when removing the cast iron pan from the heat and flip the steak to coat it.
3. Let the steak rest for 10 minutes and enjoy.
Notes
Cover the steak with a loose tent of aluminum foil while it’s resting so it doesn’t dry out.
Reverse Seared Steak – Nutritional Facts
Per Serving (based on 1 large steak serving, based on a 2,000-calorie daily diet)
| Nutrient | Amount (% Daily Value (DV)) |
|---|---|
| Calories | 690 (35%) |
| Total Fat | 52g (67%) |
| Saturated Fat | 20g (100%) |
| Trans Fat | 2g |
| Cholesterol | 150mg (50%) |
| Sodium | 540mg (23%) |
| Total Carbohydrate | 0g (0%) |
| Dietary Fiber | 0g (0%) |
| Total Sugars | 0g |
| Added Sugars | 0g (0%) |
| Protein | 52g (104%) |
| Vitamin D | 0.4mcg (2%) |
| Calcium | 26mg (2%) |
| Iron | 4.6mg (26%) |
| Potassium | 700mg (15%) |
Reverse Sear Steak FAQs

Reverse Seared Steak
Ingredients
- 1 thick cut steak, at least 1.5-2 inches thick for best results
- 1/4-1/2 tsp salt, depending on the size of steak
- cracked black pepper, to taste
- 2 tbsp high heat oil with a neutral taste, such as sunflower or avocado oil
- 2 tbsp salted butter (optional)
Instructions
- Preheat your oven to 250 degrees F or prepare your grill and let it settle at around that temperature.
- Cook the steak until it reaches a temperature 10 degrees below the desired level of doneness, checking often with a meat thermometer
- Move the steak to a plate and heat the cast iron pan on a stovetop. Add the neutral oil. When a drop of water shimmers on the oil, add the steak.
- Flip it so all of the sides are seared for about 45 seconds to 1 minute each. Add the butter when removing the cast iron pan from the heat and flip the steak to coat it
- Let the steak rest for 10 minutes and enjoy!

